
Anthea Blouse Hack Sewing Instructions


Today I thought it would be fun to share a tutorial on how to alter the Anthea Blouse to create a scoop neckline, ruffles and shirred elastic puffed sleeves! I absolutely love “hacking” patterns into new creations and I hope this inspires you to create something new from the Anthea Blouse + Dress pattern! I am thinking next I need to make the dress version! Also, if you scroll to the bottom of this tutorial, I have included instructions on a previous version I posted about on Instagram. It’s very similar, but has a few additional alterations.
If you use this tutorial and would like to share on social media, please feel free to tag me @annaallenclothing or use the hashtag #antheablousehack. Enjoy!
In this tutorial, I will show you how to cut the neckline lower into a scoop (using the free pdf pattern extension linked below), add a neckline ruffle and how to sew elastic shirring to the sleeves in place of the sleeve cuff. You can also omit the front button placket and add extra fullness to the blouse as I did for a previous version, instructions towards the end of this tutorial.
WHAT YOU NEED
Anthea Blouse + Dress PDF Pattern
Anthea Hack Scoop Neck Expansion PDF Pattern
¼ yard extra fabric for neck ruffle and necktie (I used Liberty of London cotton lawn called Donna Leigh)
1-2 spools of elastic thread (I used Gutterman)
All other fabric/notion requirements can be found in the Anthea PDF Pattern
MAKING ALTERATIONS TO THE PATTERN
Download and print out the scoop neck expansion pattern pieces to use with the Anthea Blouse pattern here:

- Scoop neckline: Place the scoop neck pattern pieces onto the Anthea front and back bodice pattern pieces and trace to create the new neckline. As you can see here, I had already cut out the Anthea blouse before I decided to do this hack.

- Sleeves: I decided to keep the original sleeve as is, including the dip at the hemline of the sleeve. However, you may want to straighten the bottom of the sleeve as I did for my previous version (scroll to the bottom for more information on the previous version).
- Sleeve notches: Move the sleeve notches higher up onto the sleeve cap, about 7-8” up from the original notches. Mark the new notch placement on both the sleeve and bodice armhole front/back. This brings the gathers up onto the shoulder instead of more evenly placed around the armhole as in the original sleeve. Doing this makes a fuller condensed puff at the shoulders. If you prefer the original puffed sleeve, you can skip this!

- Bias Tape (for neckline facing): Cut bias tape the length of the new neckline plus 1" x 1 1/4" wide.
- Neck ruffle: Take the neckline measurement and multiply by 1.5 for the length by 3” wide (more or less, depending on how wide you want your ruffle). Cut fabric on the straight grain (don’t cut on the bias as this will make it very difficult to hem). Note: you can choose to cut the ruffle a bit longer and adjust the fullness when you pin it to the neckline.

ASSEMBLE BLOUSE
- Follow along with the Anthea Blouse instructions (steps 1-5). I chose to sew French seams on this blouse (except for the armholes which I used a serger to finish the seams).

NECK RUFFLE
- Hem the bottom of the ruffle using a very narrow hem. Press edge up ⅛” and again ⅛” and stitch. If this is too difficult for you, you can press ¼” up instead of ⅛”.
- Sew two rows of basting stitches along top edge of ruffle and draw threads to gather slightly. I also lightly pressed the ruffle as I find it makes it easier to attach to the neckline.


- Before attaching the ruffle to the neckline, you may choose to sew a row of basting stitches around the neckline and pull in slightly. This will keep the neckline from gaping open. As the Anthea blouse was drafted with a higher neckline, there is more ease added in this area than you would normally want for a low neckline. I tried the bodice on and found I needed to ease in the neckline slightly but you may find you don’t need to do this. I recommend trying the blouse on before finishing the neckline just to be sure.

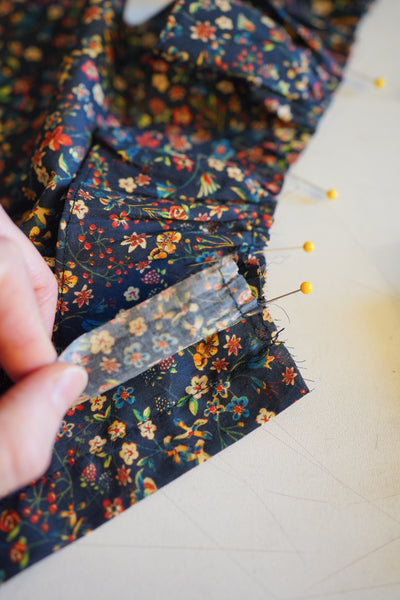
- Begin pinning ruffle (wrong side of ruffle to right side at the neckline), extending about ½” extra length on either side of the ruffle edge for hemming later on.

- The finished ruffle edges will line up at the placket stitching line (or ¾” away from the front edge). You will hem the ruffle edges after you determine how much fullness you want in the neck ruffle. Once you have pinned the ruffle on the neckline, trim off any excess (being careful not to let out any gathers!) and hem both edges with a narrow hem (⅛” folded twice).


- If you need to baste the ruffle to secure it to the neckline before attaching the bias tape, do so now.
- With right sides together, pin the bias tape to the ruffle along neckline. Follow steps 6-9 in the Anthea Blouse sewing instructions for sewing bias tape to the neckline.

- Fold bias tape to the underside of the bodice, pressing bias tape down while also pressing neck ruffle up. Stitch bias tape to neckline along folded edge.

- Press neck ruffle down so it lays flat against the neckline (wrong side of ruffle to right side of blouse). Put blouse aside while you work on the sleeves.
SLEEVES
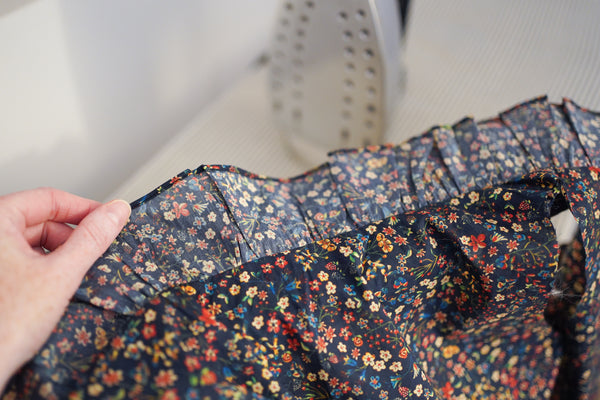
- On the right side of the sleeve, using chalk or a fabric pen, mark a straight line for the armband shirring. Mark the bottom row 4” from the bottom edge of the sleeve (at the center where it dips down), or 2” from the sleeve edges. This is where the first row of shirring elastic will go (you will sew the next row of elastic above this line). You can choose to mark the remaining rows above this line (⅜” apart), but I prefer to use the presser foot as my guide.

- Before you sew the elastic shirring, hem the bottom edge with a narrow ¼” hem (press ⅛” up and then ⅛” again). If you can’t sew such a tiny hem, do the best you can even if you need to use a ½” hem allowance.

- Sewing elastic shirring: I recommend you practice sewing the elastic shirring with scrap fabric before you start sewing the shirring on the sleeves. First you need to hand wind the elastic thread onto the bobbin with light tension. You may also need to tighten your thread tension on your machine. There is a great highlight on sewing elastic shirring from By Hand London’s Instagram page (titled “Shirred Dress”) that you might want to check out for more tips.

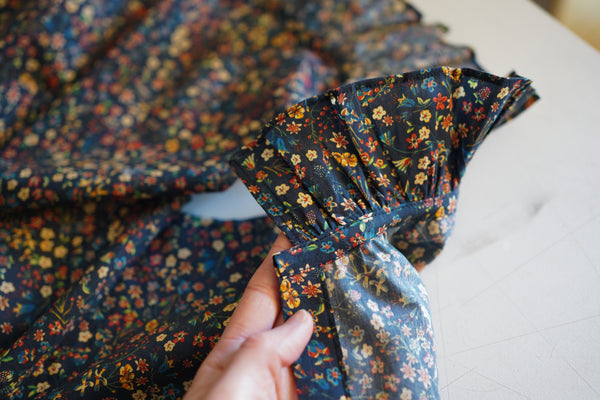
- Sewing on the right side of the sleeve, stitch one row of shirring elastic on the line you marked. Leave a few inches of elastic at the end before you cut the threads and don't knot it! Sew another row ⅜” above the first. Continue sewing rows of elastic until you have 4 rows total. My previous blouse only had two rows of elastic and you can have more or less depending on the look you are going for.

- Once you have finished sewing the elastic shirring, you may choose to tighten the elastic slightly by pulling on the elastic thread to create more dense gathers. Be careful as the elastic may break if you pull too hard! Once you make the changes and sew the sleeve seams, you will not be able to adjust this! So be mindful about not making the shirring too tight!


- I like to sew French seams as I find it makes the shirring elastic more secure and gives it a pretty edge. To sew a French seam, with wrong sides together stitch sleeve seams using a ¼” seam allowance.
- Trim seams to ⅛” and then press to one side.

- Turn the sleeve so wrong side is facing out and press seam right sides together. Pin and stitch together using a ¼” seam allowance. Press French seam to back.

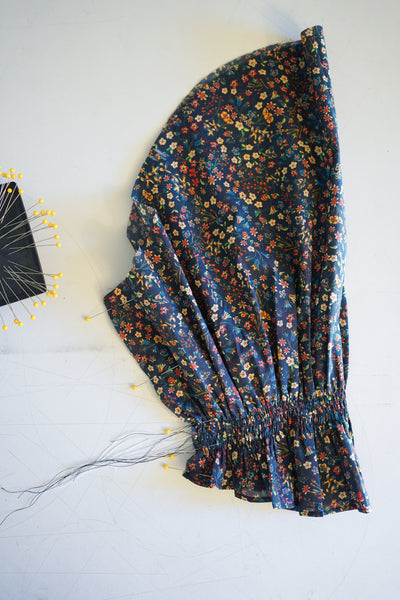
- Sew two rows of basting stitches along top edge of sleeve cap between notches. Repeat instructions for the second sleeve.
ATTACHING SLEEVES
- Follow pattern sewing instructions (steps 18-19) for attaching sleeves to the armholes. For this blouse I decided to press the armhole seam towards the sleeve as it will give the sleeve a higher puff. I prefer this when the gathers are more concentrated at the shoulder. You can choose to do this or follow the original instructions which tell you to press the seam towards the shoulder.

FINISHING
- Follow steps 21-23 in the Anthea Blouse sewing instructions to hem the blouse and finish the button placket.

NECK TIES
- The neck ties add a nice finishing touch, but this is optional. Cut a strip of fabric on the straight grain 1” x 40" long. Press edges under ¼” including on either side of the strip. Then press in half lengthwise and stitch along outer edges (tucking in any raw edges that may be sticking out before stitching it down).


- Cut the neck tie in half so you have two separate neckties. Fold the cut edge under ¼” and attach ties on either side of the front neckline just under the edge of the ruffle. Pin and stitch in place.


- You may also choose to tack down the front ruffle edge with a few stitches near the neckline so it lays flat. Tie the neckties into a bow and you’re done!


PREVIOUS VERSION


For the previous version there were a few more adjustments made to the pattern. Add 2” of extra width to the blouse pattern pieces at center front and center back. Straighten out the bottom hem so it doesn't dip as much. The hemline will still have a very slight curve.
Cut the front and back pattern pieces on the fold, omitting the button placket entirely.
Once you have your front and back pieces cut out, sew two rows of basting stitches about 8-10" along the neckline edge at center front and center back.


Pull in the basting stitches to create gathers at the neckline. Try on the blouse to determine how much to take in or let out at the neckline before knotting the threads. Making this alteration creates more fullness in the blouse, but this is optional (you can still omit the placket whether you add more fullness or not).

Straighten the bottom edge of the sleeve pattern piece by cutting off where it dips down. I used view B, which is the shorter sleeve, and sewed two rows of elastic shirring about 1” away from the hemmed edge. These are the only other alterations I made for this version.

